KeePassXC with Nextcloud sync
I've been using KeePassXC over Bitwarden for some time and I'm really liking so far.
I switched to KeePassXC due to some Bitwarden concerns: they're being supposedly taken over by a private equity, and from this concern I looked to good alternatives and found KeePassXC.
Now, KeePassXC doesn't automatically sync your password database to cloud, and their own website recommends to do your own synchronization service.
So, I made my own lazy way to sync to Cloud. But first off: I don't want you to hop off Bitwarden! It's still (yet) a good service to store all your passwords.
We'll sync to cloud via Nextcloud. Even though its a self-hosting service, Disroot offers a free 2GB Nextcloud account for users, through their encrypted cloud instance. Which is more than enough for our database! Our you can use your own Nextcloud instance, if you have one.
Consider using KeePassXC if:
- you want a totally open-source program;
- you want a local-first program to store your passwords without relying to third-party;
- you just want a program without corporate bullshit;
Also, if KeePassXC is your first password manager, don't worry, this is also for you.
Downloading KeePassXC
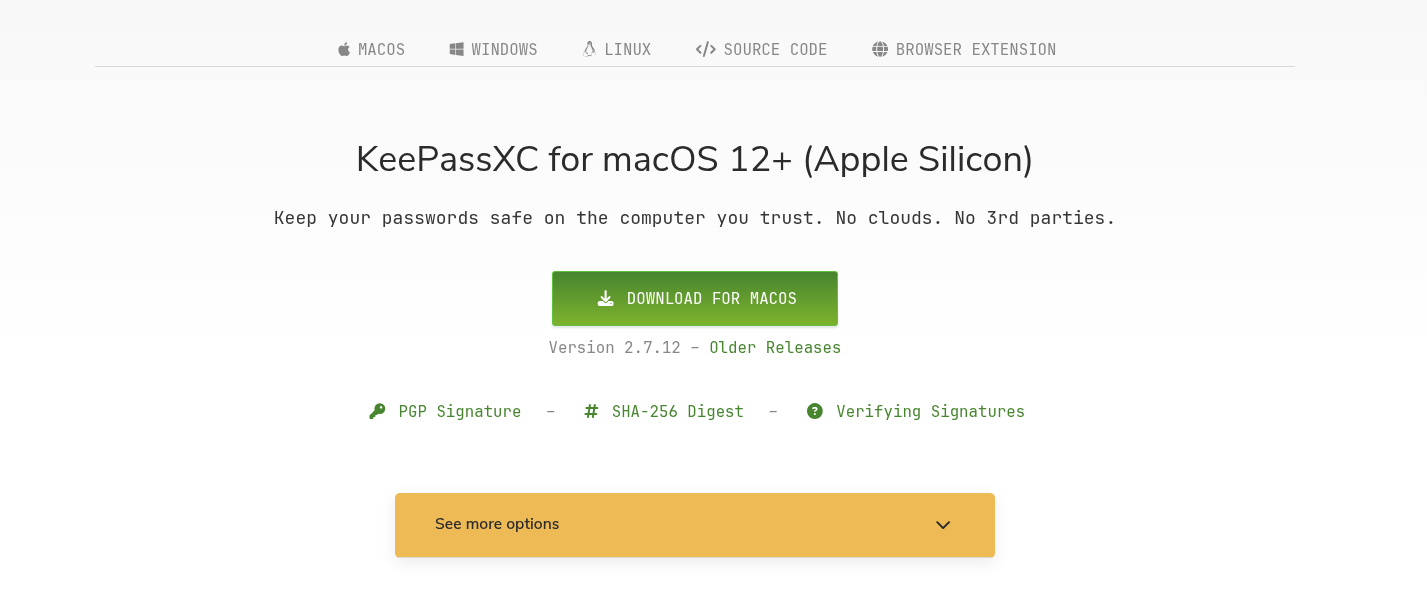
First off, let's install the program! Go to KeePassXC official website and click Download.
Select your platform and download. If you're on Linux, download via the official Flatpak package. Even though you may only use one way to install your apps, it's recommended way.

Configuring your first database
Creating a database
Open your KeePassXC, and click "Create Database".

Then, you'll be prompted to config your database: name, description, encryption...
If you are unsure, use the default settings recommended by KeePassXC.
Enter a password for the database. My recommendation is to use the software's password generator. Set the generator to use 30 or more characters and to use more than 3 characters type. Or you can use the passphrase generator with 8-10 word counts.
For maximum security, add a key file. Leave it in a good place. DO NOT CHANGE THESE FILE, E.G: RENAMING. This way your database will prompt the key file and the password to unlock it.
Save it in a folder. Your database is ready to use.
Importing from other password managers (optional)
If you are coming from Bitwarden or other managers (ProtonPass, 1Password), go to "Database" in your toolbar, and click "Import".
You'll be prompted to select which file/manager you're importing. Depending from your file/manager, enter the password to unlock it.
Import it to your database and all your passwords will be securely stored.
Adding a new entry
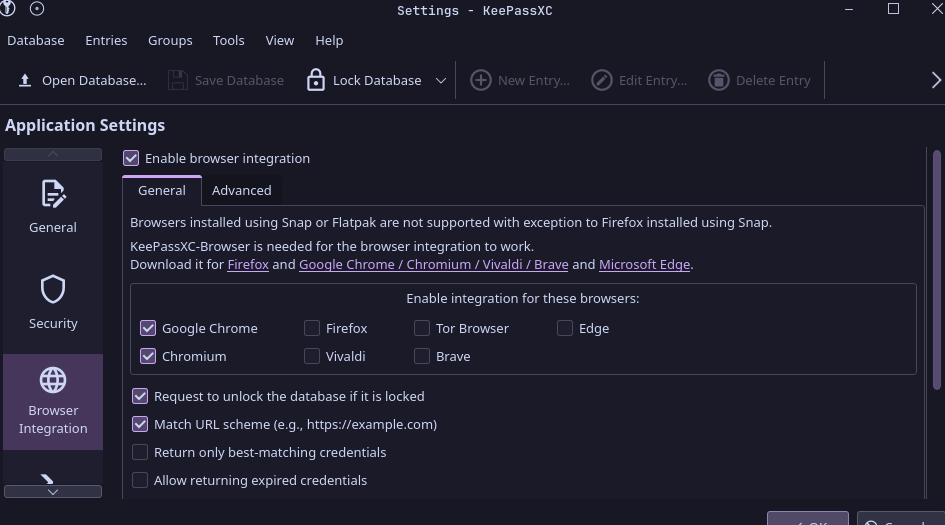
To add new entry/password for your database, click "New Entry".
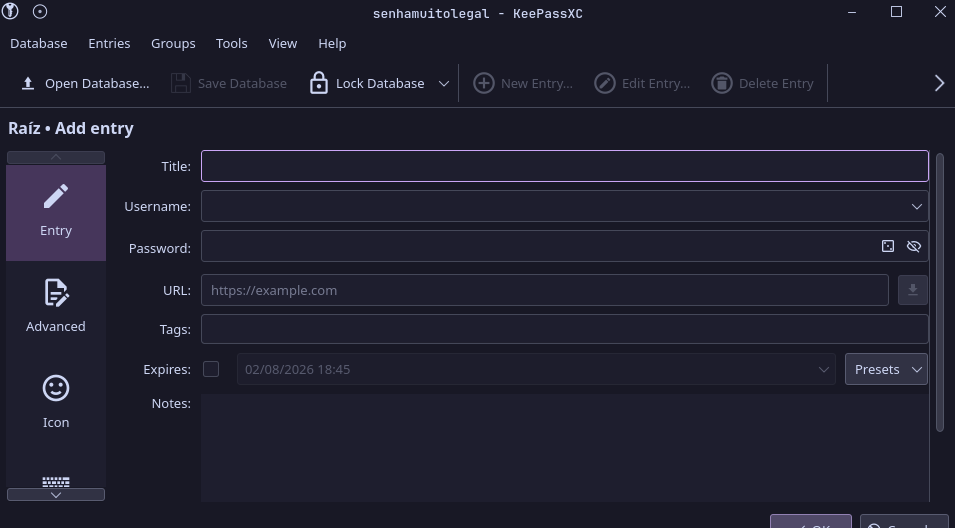
From there, you can config your new entry. You can tag your entry, add a note, make it temporary, generate a new password and make it the origin URL of your account.
My recommendation for the password generator is 30 characters and 3 or more character types. And 10 words for the passphrase generator.
Installing the browser extension
If you want to integrate your KeePass with your browser, there's a official extension to insert your passwords instantly.
But first you need to enable it:
Go to Tools > Settings > Browser Integration, check "Enable browser integration" and check the type of browser you use.
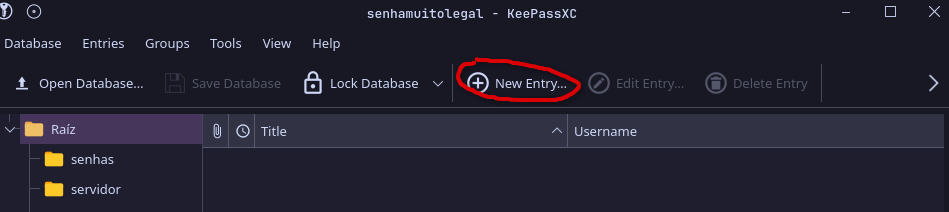
Now install the KeePassXC-Browser for Firefox or Chromium-based browsers.
Preparing the cloud sync
You'll need a Nextcloud instance. It can be your self-hosted instance, or a free, independent instance. I recommend Disroot's Nextcloud, but you'll need to ask a form and wait to be accepted, and they're closed on weekends.
Download Nextcloud Files in their official website. Open it, and login it with your instance's account.
Follow the prompt. After creating a folder to sync Nextcloud with your system, you can:
- move the folder of your database to your Nextcloud folder, thus syncing to cloud;
- create a folder link within Nextcloud app: go to settings > your Nextcloud account > choose the database folder and then the remote folder.
Done!
Enjoy your new local-first database! Feedbacks are appreciated.